The Main Configuration Screen


Main Configuration
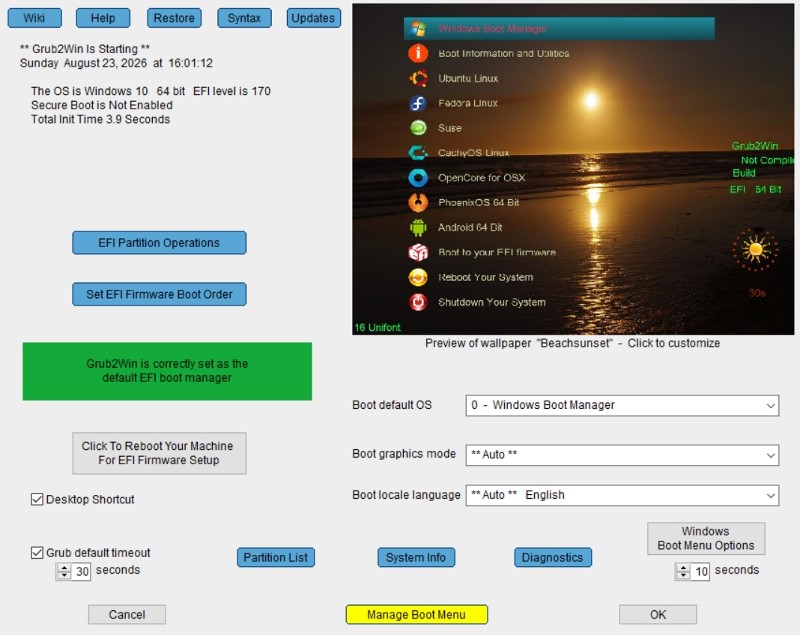
This is the first screen that will appear when you run Grub2Win.exe
To customize the wallpaper, click the preview image.
This will take you to the Customize Wallpaper screen.
When the boot graphics mode is set to ** Text ** the customize option is not available.
Wiki
Click this button to see the help files from the Grub2Win online Wiki site.
These are always the most current help files available.
When you click Help from any Grub2Win page, you will see the help files that were installed to your hard drive during Grub2Win setup.
Restore
Each time you run Grub2Win, an automatic backup is made of your BCD, configuration and menu settings.
These backups are stored in C:\grub2\windata\backups. The five most recent backups are saved. If you wish to restore your settings to an earlier time, you can click this button. You be then be prompted to restore one of those five previous backups. The Windows BCD backup will also be restored. Once the restore has completed successfully, the Grub2Win program will restart.
Syntax
Click this button if you want to check a Grub configuration file for basic syntax errors. A file open dialog will appear, allowing you to select a .cfg file for the syntax check. The default is the main Grub2Win configuration file C:\grub2\grub.cfg. The syntax checker only flags basic errors such as unmatched quotes, if fi clauses and brackets. More detailed checking may be added in a future release.
Updates
Click this button to see the version and release date of Grub2win. The Check For Updates screen will appear, where you can download the latest updates and change log.
EFI Partition Operations (Only appears in EFI mode)
Clicking this button will let you update your EFI partitions. The EFI Update Log screen will appear showing progress as the program scans your disks for valid EFI partitions. Once the EFI partitions are allocated, you will be taken to the EFI update actions screen where you can browse and update your EFI partitions.
Set EFI Firmware Order (Only appears in EFI mode)
Clicking this button brings up the EFI Firmware Order screen. This allows you to change the boot order in your machine's firmware.
Click To Reboot Your Machine For EFI Firmware Setup (Only appears in EFI mode)
When you click this button, you will be asked to confirm a reboot to access your machine's EFI firmware setup menu.
If you do not confirm, you machine will not be rebooted and you will be returned to the main configuration screen.
Rebooting to the EFI firmware menu can be useful for setting EFI secure boot, boot order and other firmware options.
Desktop Shortcut
Check this box to create a Grub2Win shortcut on your desktop. Uncheck to remove the shortcut.
Boot default OS
The OS that will be booted automatically if you don't press an up or down arrow key.
You can also select ** Last Booted OS ** which will cause the last OS booted by Grub2Win to become the default.
Boot graphics mode
At boot time, the Grub selection menu will appear in this mode. It does not set the target OS graphics mode.
Select ** Auto ** to set the graphics mode automatically.
Select ** Text ** to disable GNU Grub graphics and boot in text only mode.
Custom resolution selections can be added by creating the gfxmode.cfg file. See the Other User Files topic for details.
Partition List
Displays a Partition Listing that contains details about the attached disks and partitions.
System Info
Displays information about the Firmware, System, Motherboard and Secure Boot status.
Diagnostics
Allows you to run the Grub2Win diagnostic routine if needed. The diagnostic data will be compressed and stored in file C:\grub2\diagnose7z.
See Diagnostics for details.
Boot locale language
At boot time, Gnu Grub will display error messages and help using the selected language.
If you select ** Auto **, Grub2Win will automatically set the locale to the currently selected Windows language.
The automatic function is only available if you are using a Windows language supported by the GNU Grub software.
See Language Support for a list of the 34 languages.
Grub default timeout
Check this box to set the number of seconds the Grub menu waits before booting the default OS.
Unchecking this box will disable the Grub timeout.
Windows Boot Menu Options
This takes you to the Windows Boot Menu Options screen where you will select Windows boot options.
The default settings shown above should work fine, but you can change them if desired.
It is important to click the Manage Boot Menu button below to add your OS selections!!
Manage Boot Menu
This takes you to the Manage Boot Menu screen where you will add your OS selections.
You must add your Linux systems or they will not appear at boot time.
After you have added and customized your OS selections, Click the OK button.
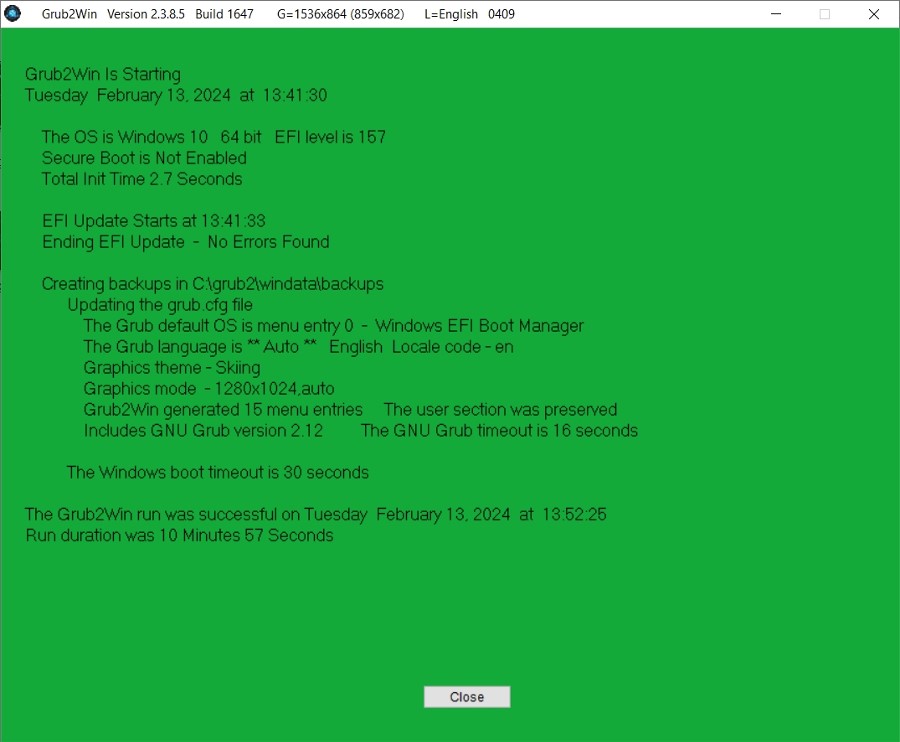
The update will now complete and the Grub2Win Log screen will appear.
You can run the GUI as often as desired when you want to add systems or change boot options. Each time you run it, a new customized grub.cfg file will be created. Backup copies of the 5 most recent settings and update logs will be maintained in the C:\grub2\windata\backup directory. Backups of the Windows BCD will also be stored there.
Created with the Personal Edition of HelpNDoc: Full-featured EPub generator